1. Installing Liquid on your project
Installing Liquid SDK on your project is very easy. Pick one of the following methods:
Install via NuGet Edit
- Install NuGet in your system.
-
Open the project folder and run the following command through the Package Manager Console:
PM> Install-Package Liquid -Pre
Install as a Project Reference (DLL) Edit
To install the Liquid SDK adding the libraries as references, you will need to download them from the Liquid website and add the library for a Windows Phone or Windows Store project in each of the specific projects as a reference.
-
Download/clone the SDK from https://github.com/lqd-io/liquid-sdk-windows .
-
Open your project properties (make sure you select <path to repository>/liquid-sdk-windows/Liquid/src/main):
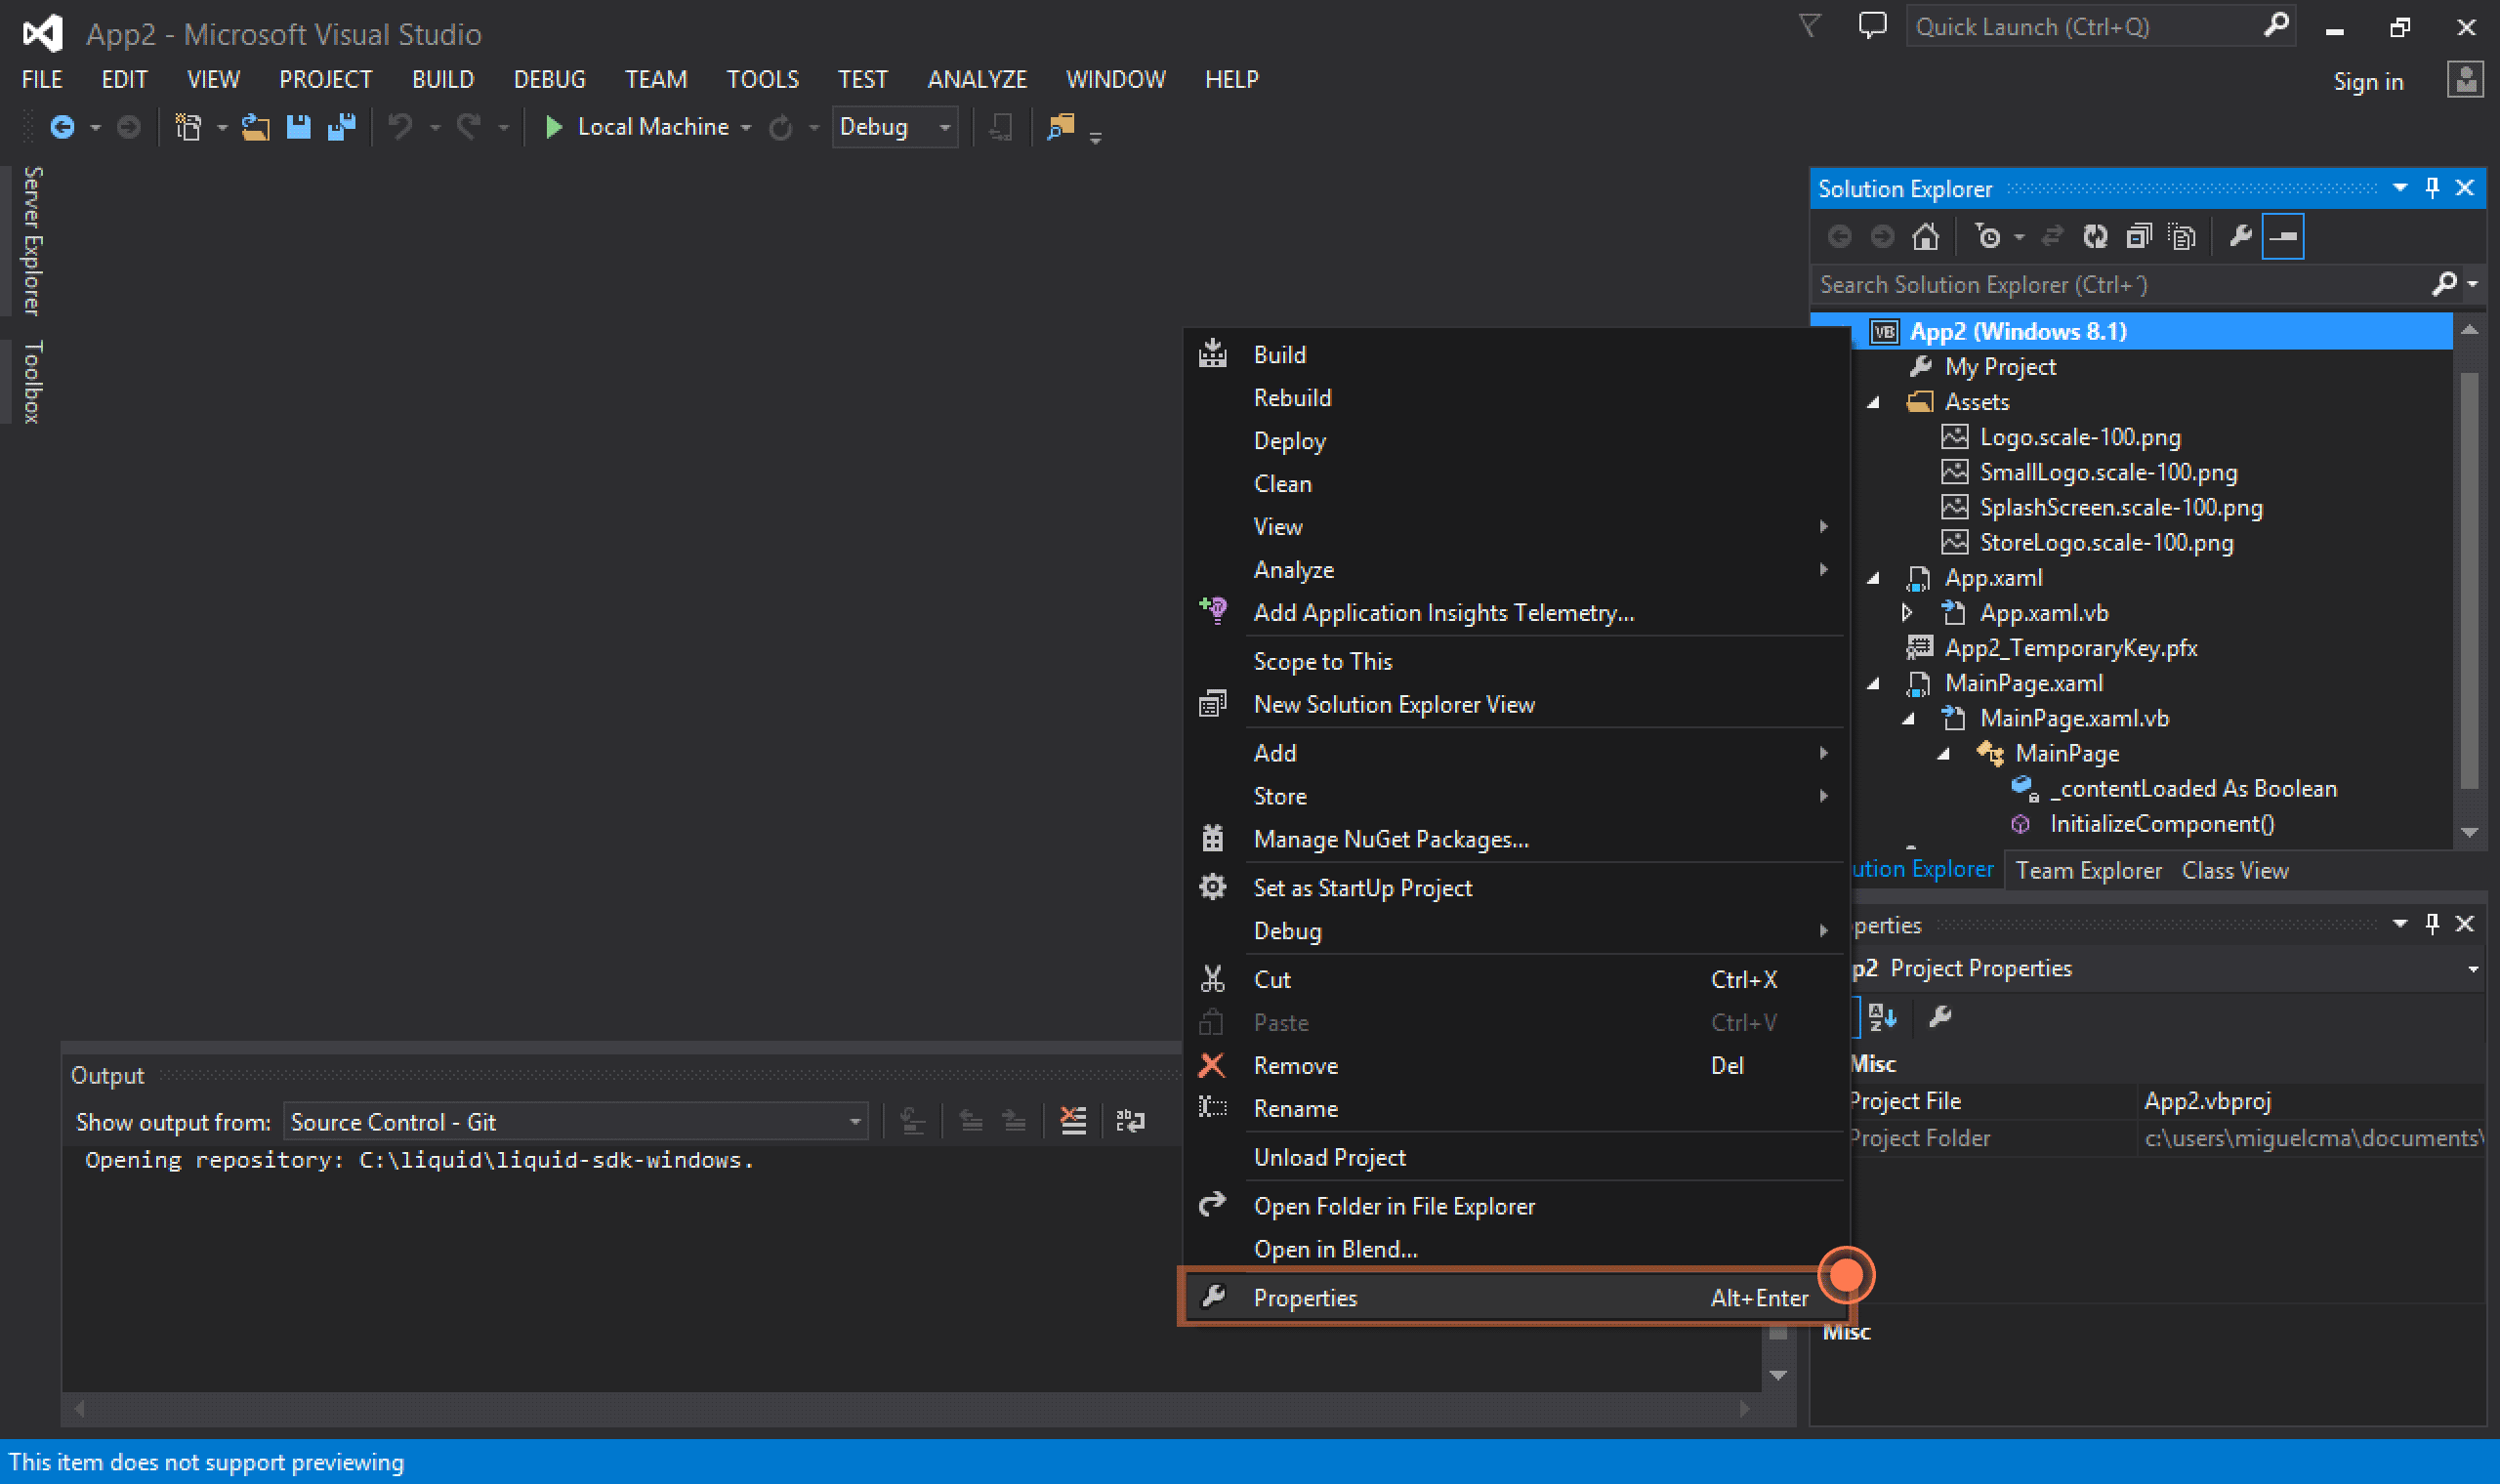
-
Go to the References pane and click Add.
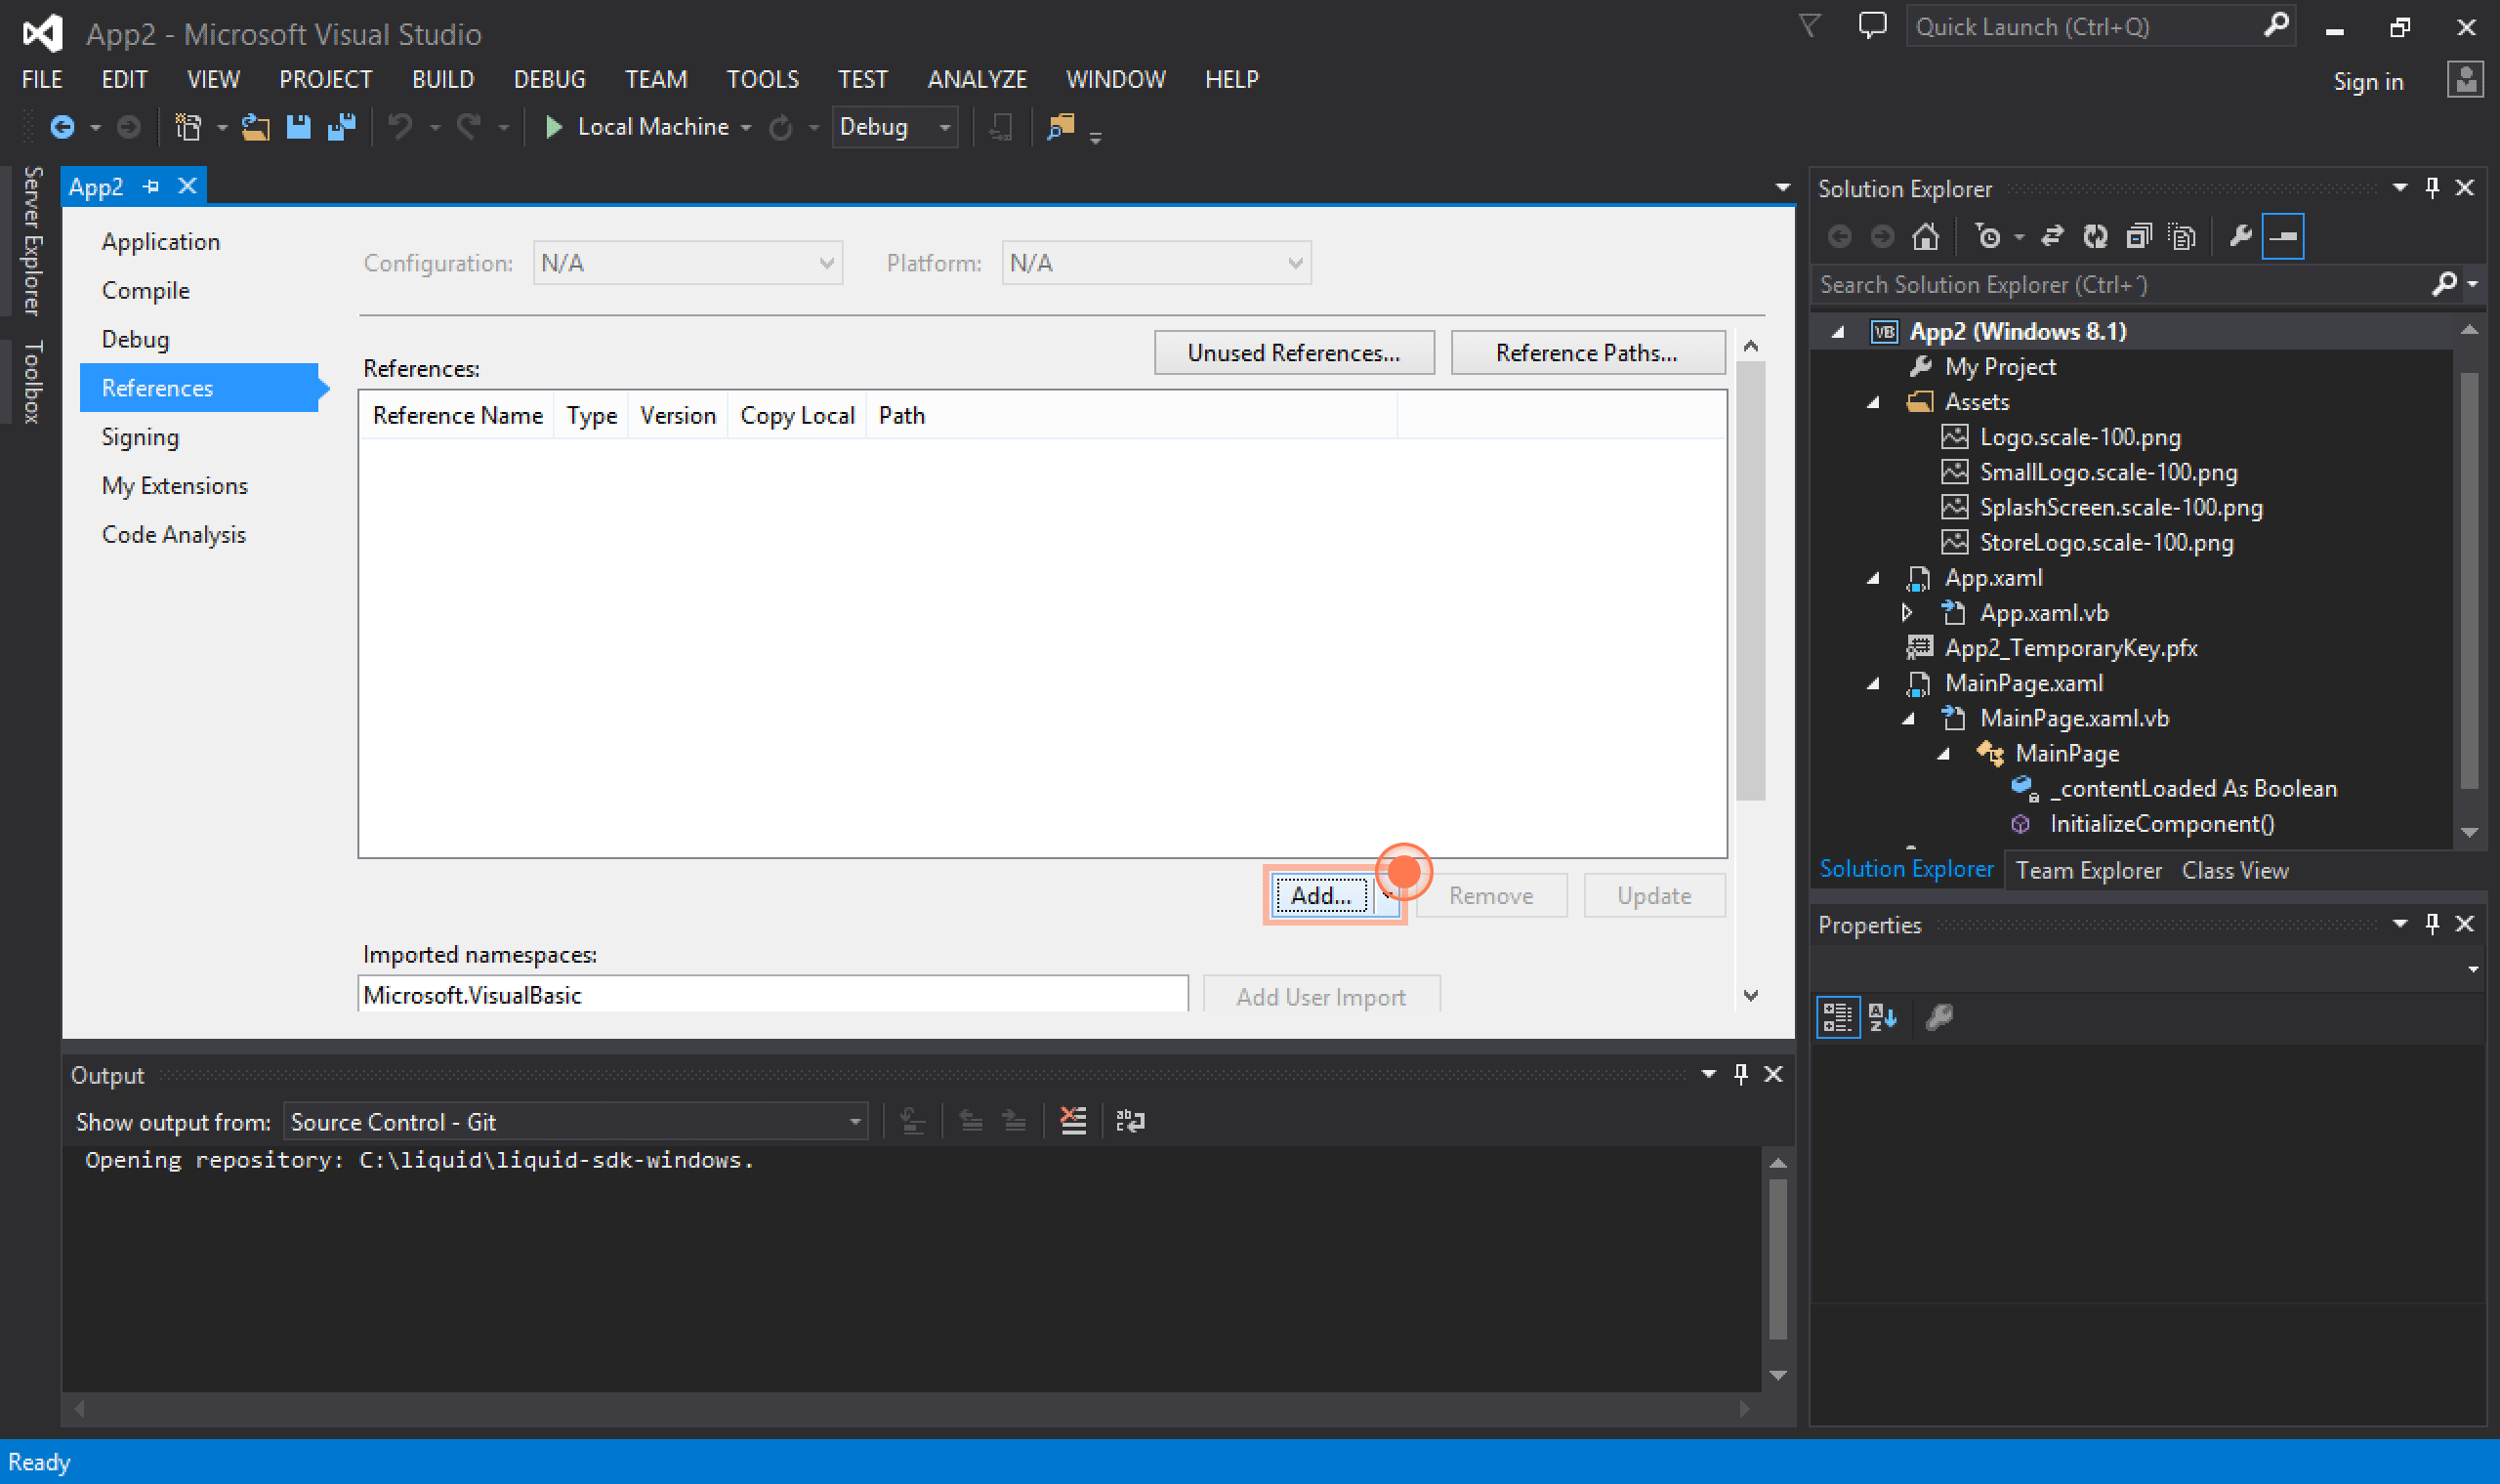
-
Once the Reference Manager windows is open, go to the Browse pane and click Browse.
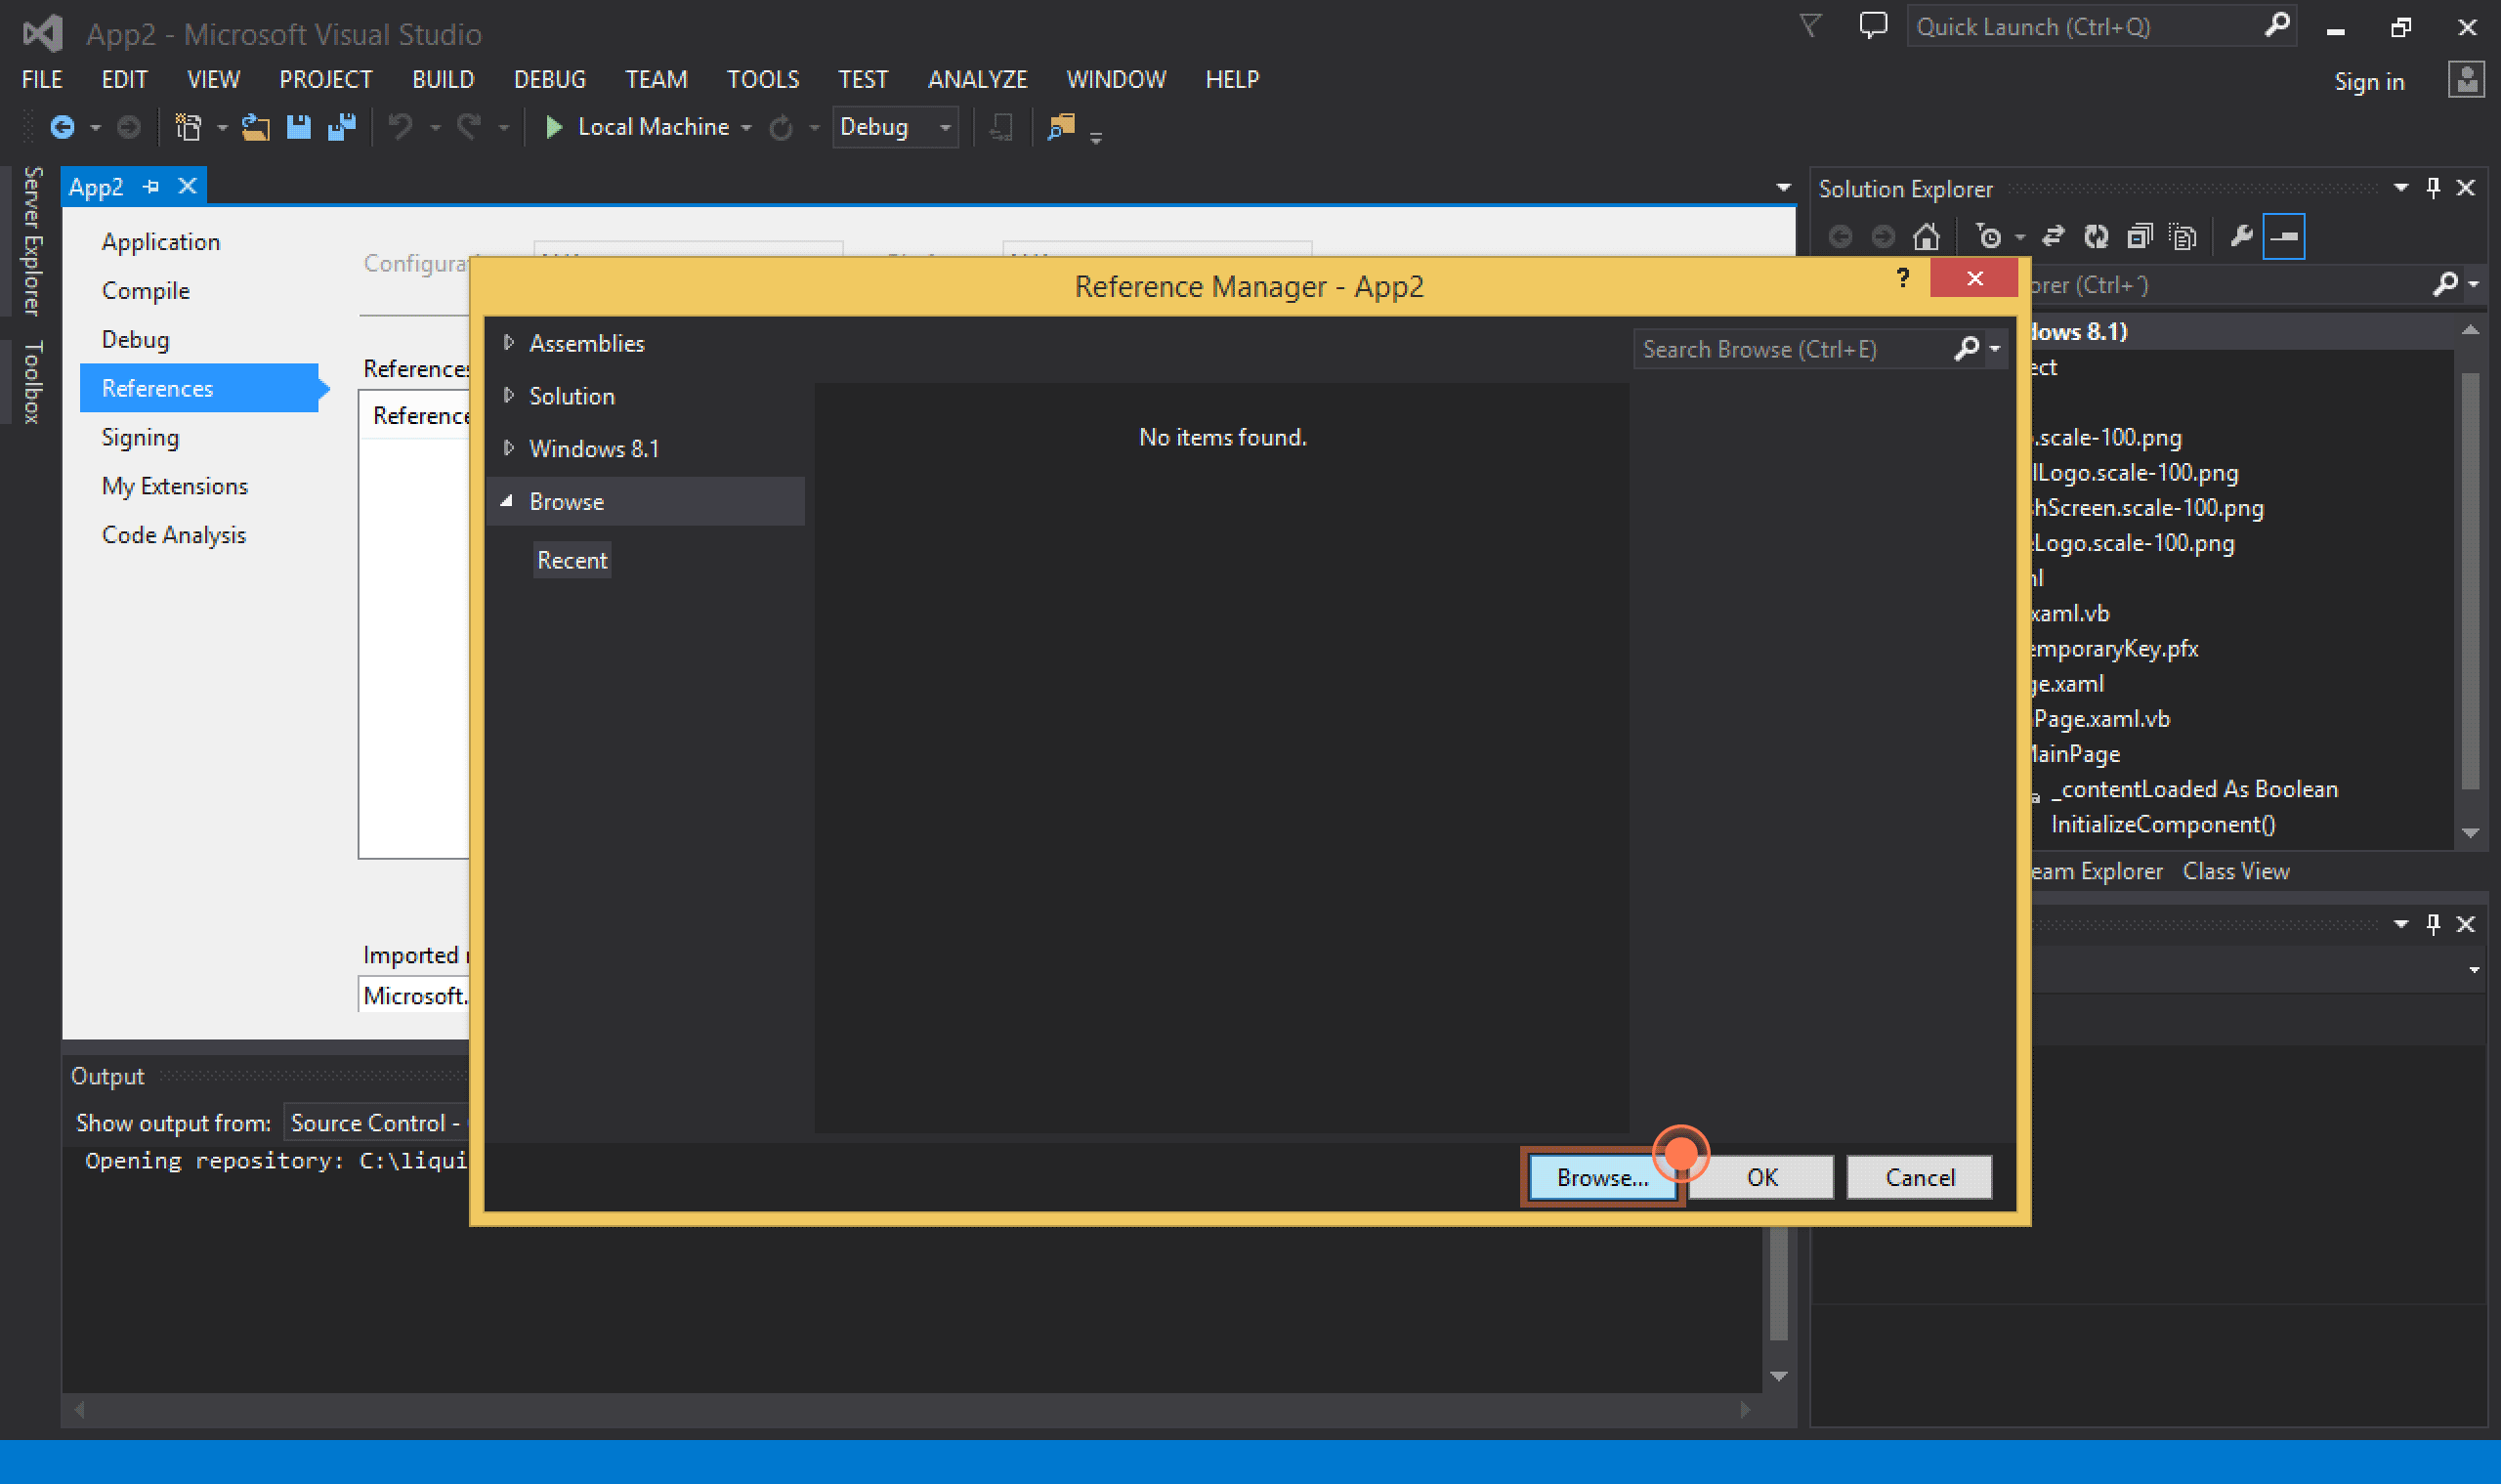
-
Search for the Liquid SDK DLL files in your file system and add
Newtonsoft.Json.dllandLiquidWindowsPhoneSDK.dll(orLiquidWindowsStoreSDK.dll, depending on your situation).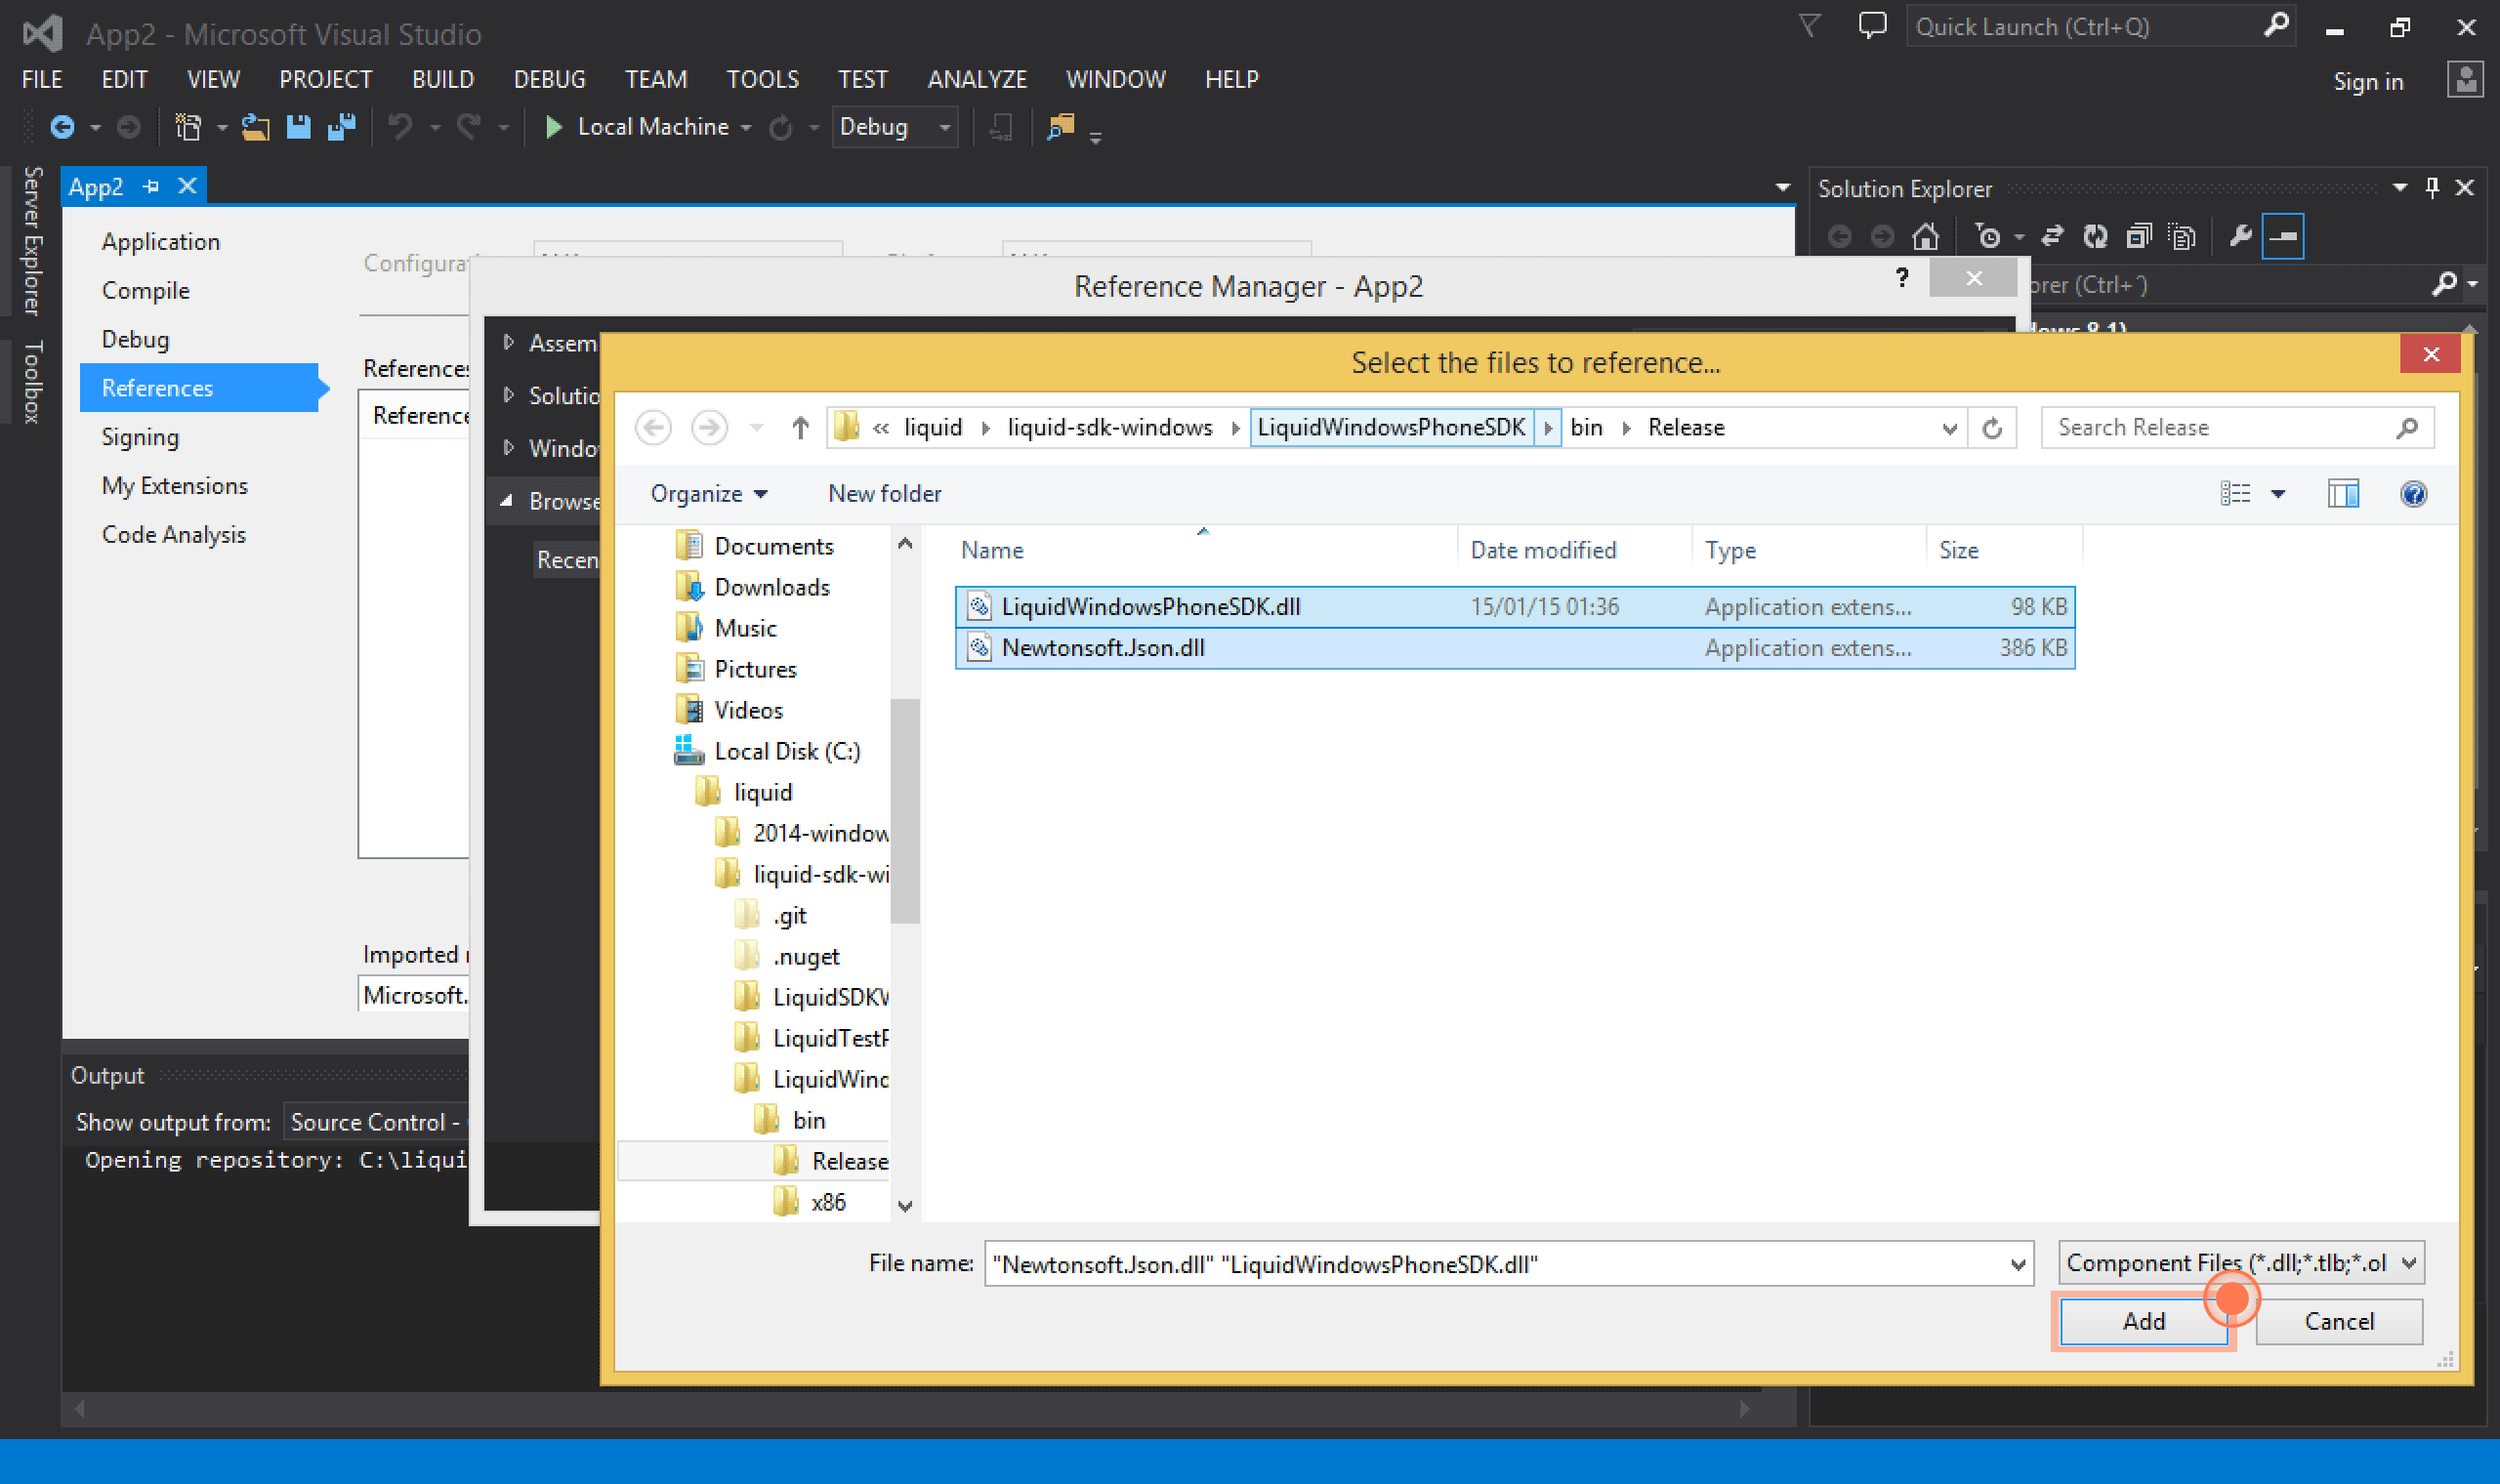
-
Once you have both files added, click Ok and you’re ready to go.
Install using the Source Code Edit
To install the Liquid SDK adding the libraries as references, you will need to download them from the Liquid website and add the library for a Windows Phone or Windows Store project in each of the specific projects.
-
Download/clone the SDK from https://github.com/lqd-io/liquid-sdk-windows .
-
Right-click your project Solution, follow Add… and select Existing Project…
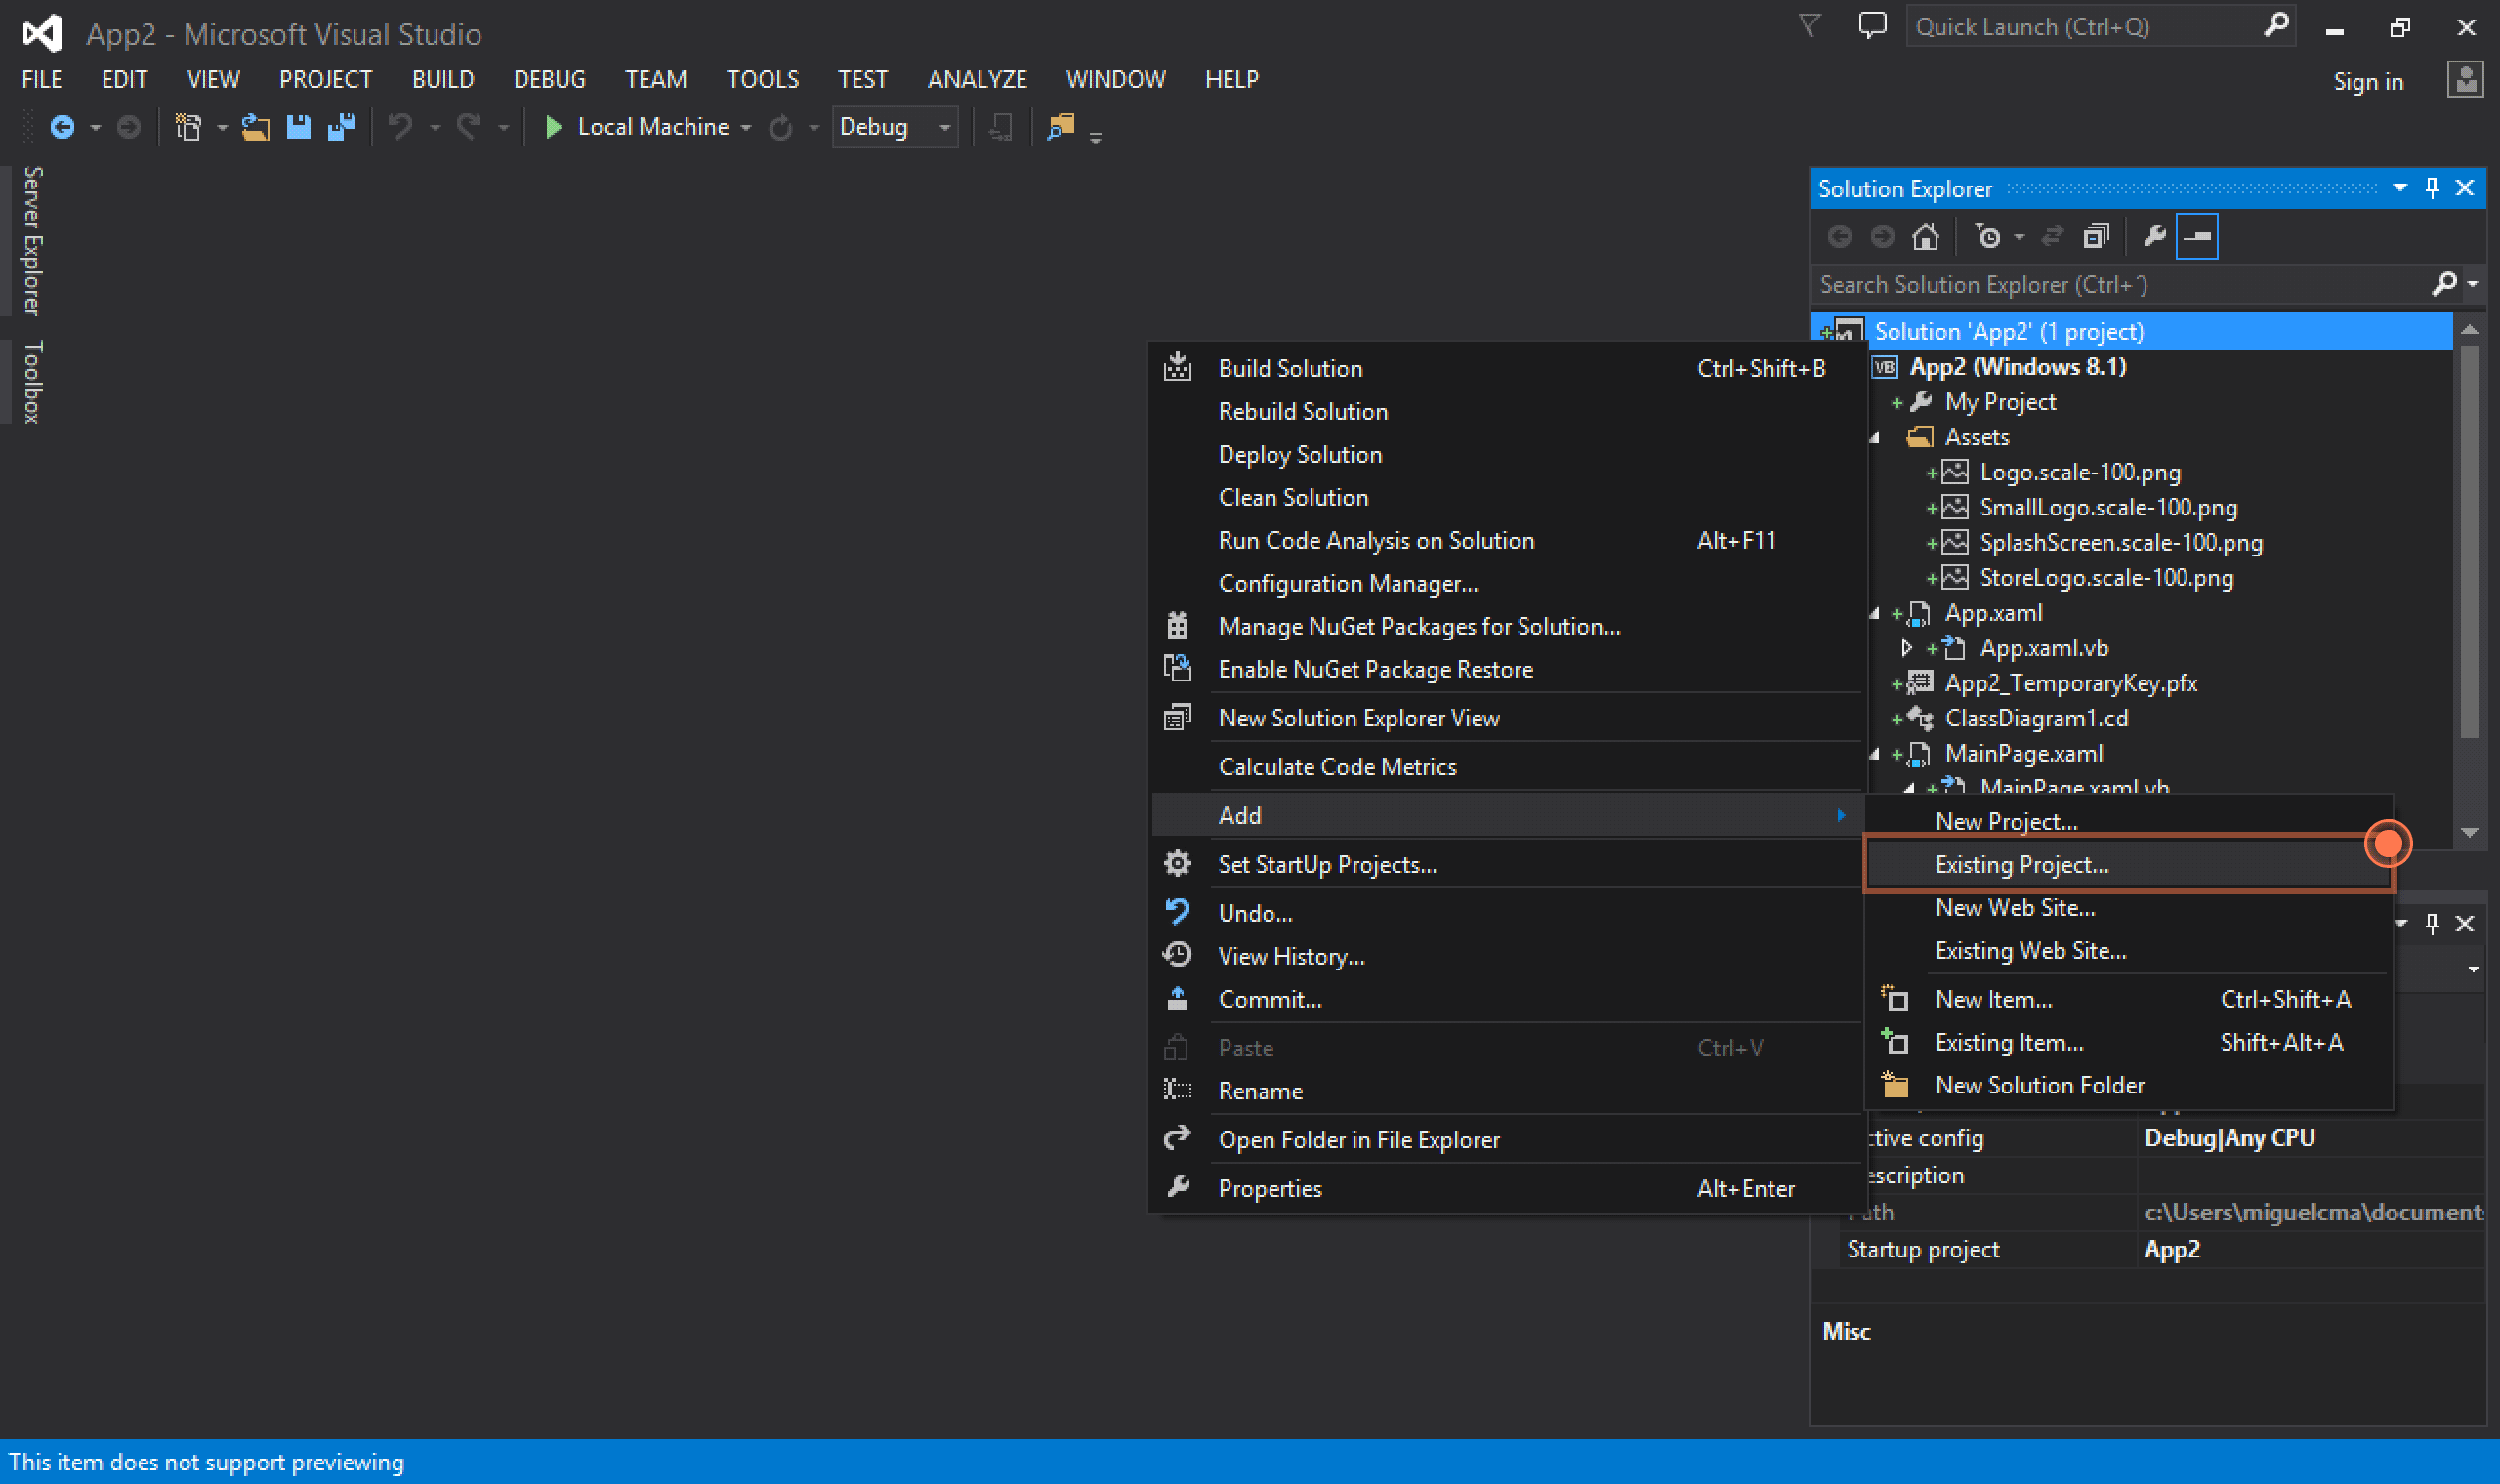
-
Search for the Liquid SDK Project in your file system and add
LiquidWindowsPhoneSDK.csproj(orLiquidWindowsStoreSDK.csproj, depending on your situation).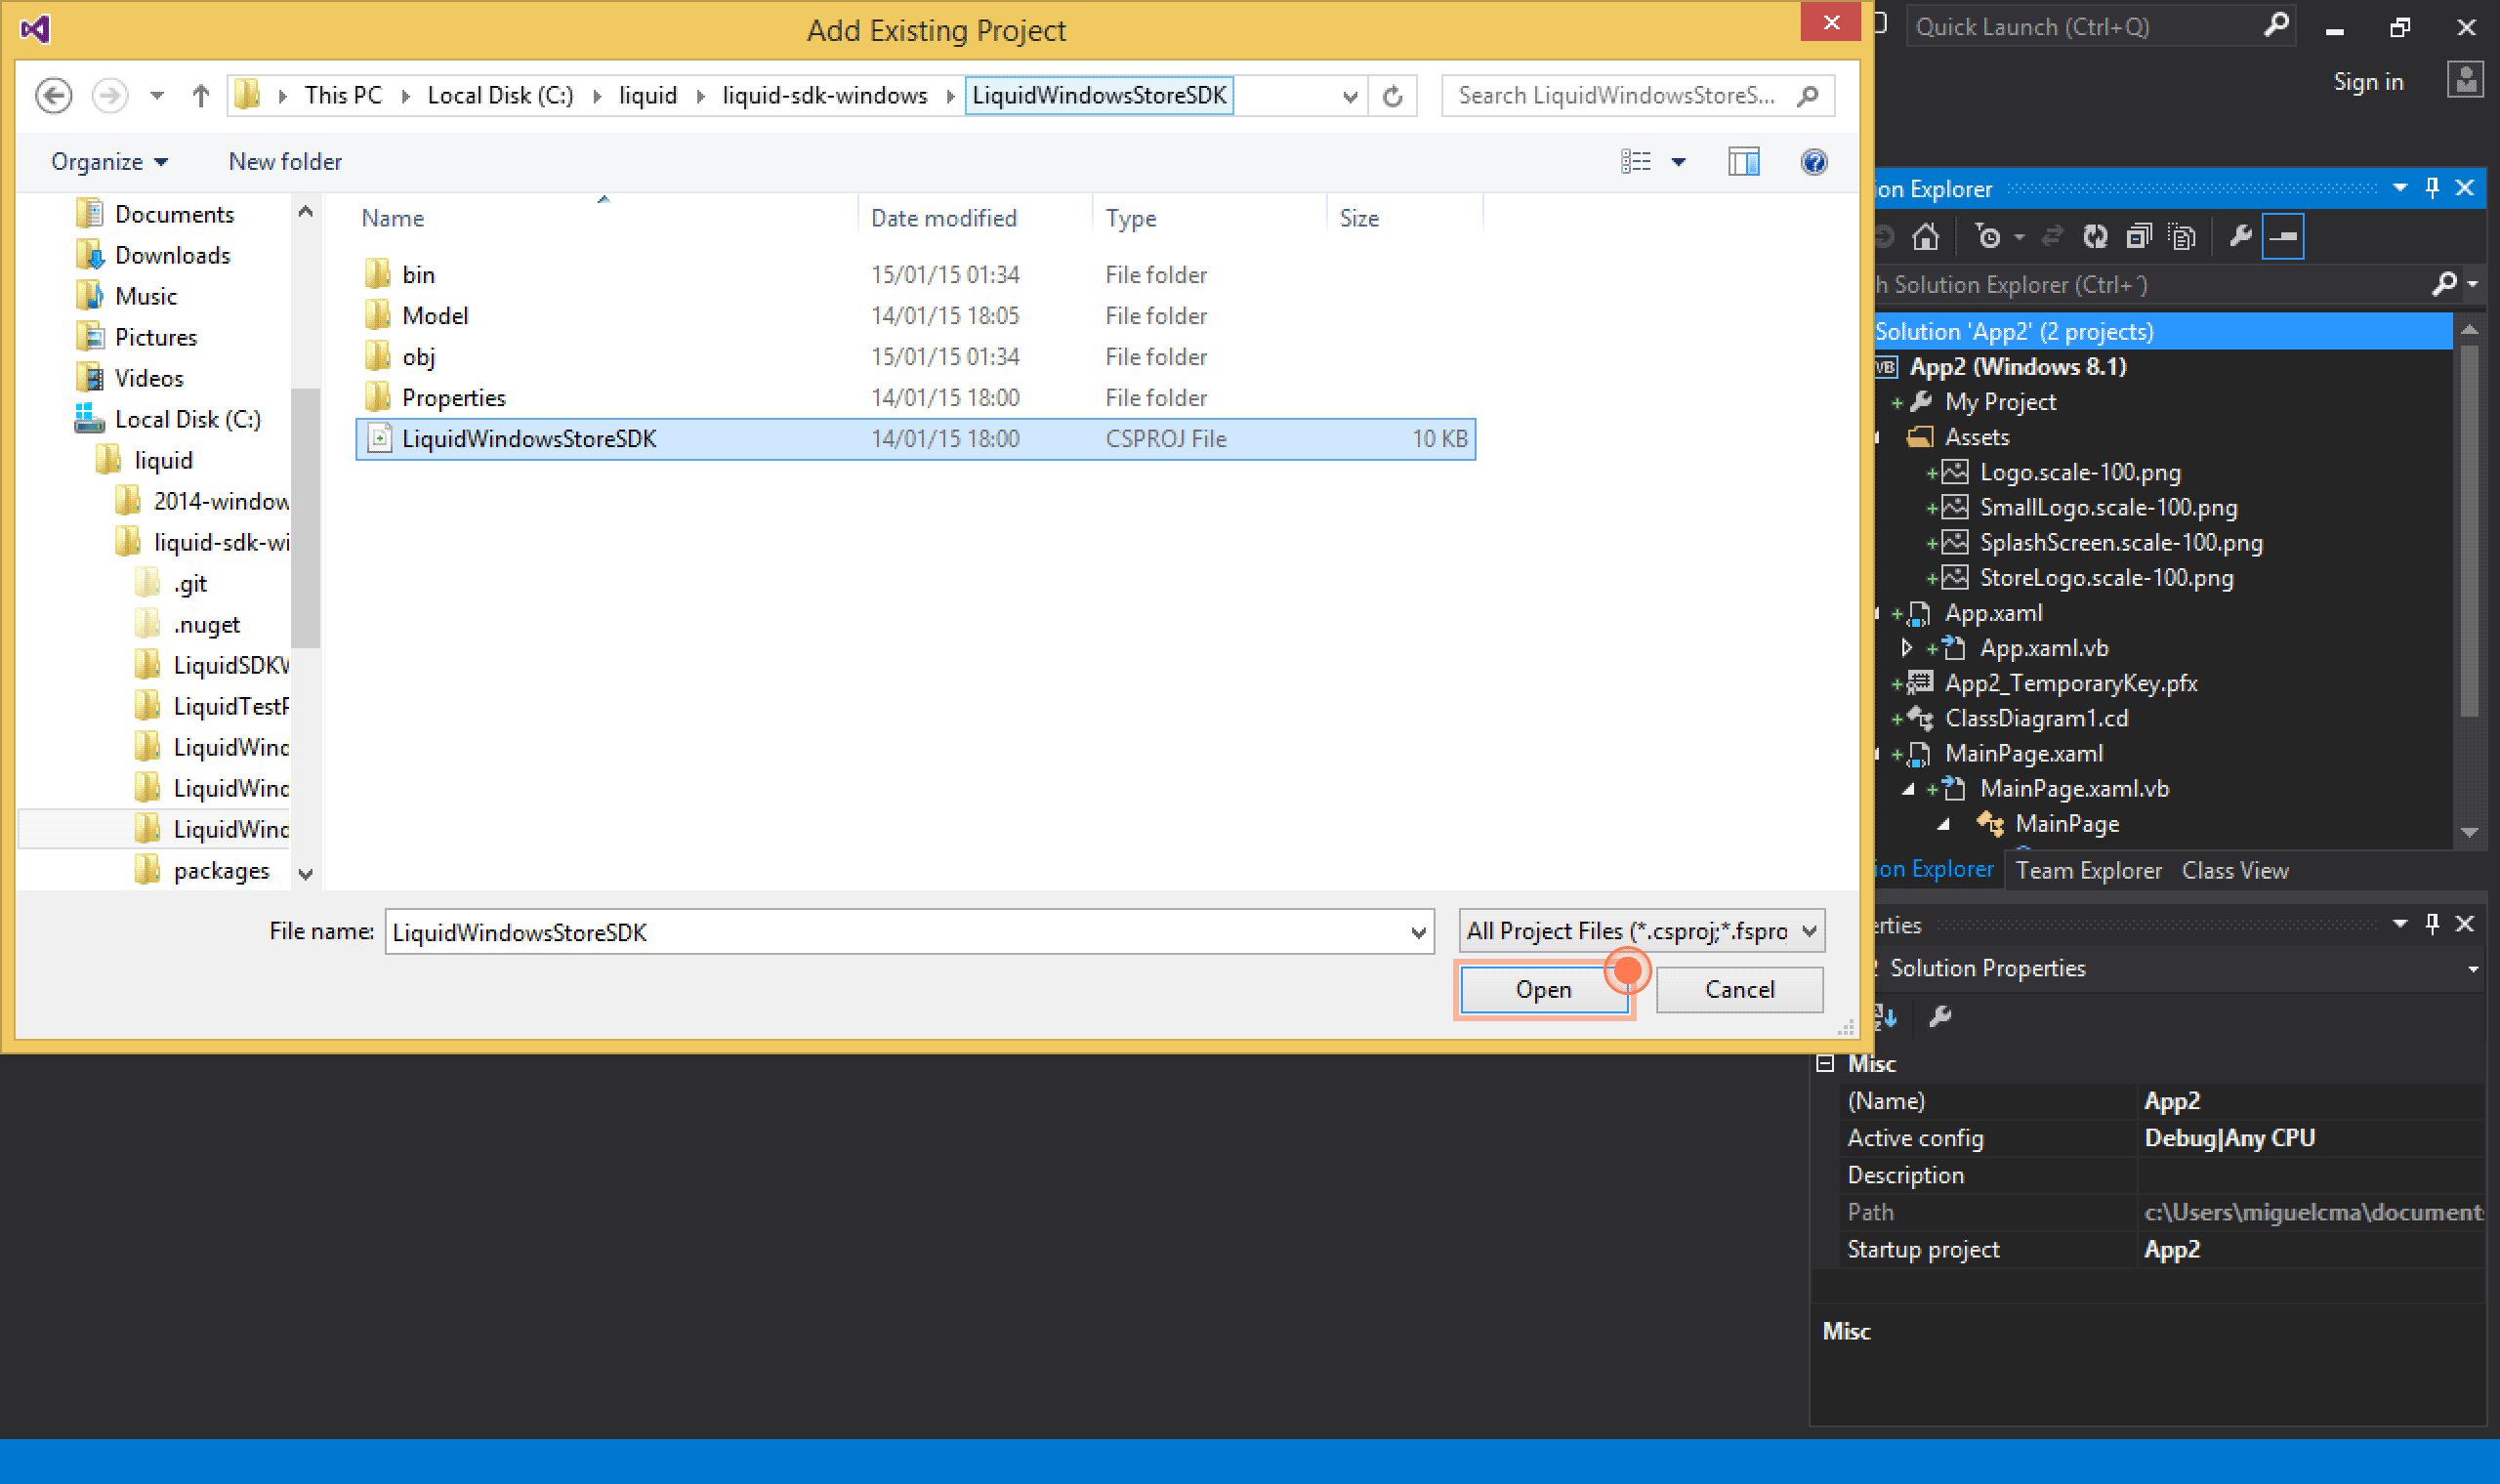
2. Using Liquid SDK
The following steps will guide you on how to integrate Liquid on your project.
You should have LiquidWindowsSDK; at the beginning of every file that uses Liquid.
Add Permissions to Application Manifest Edit
The first step is to add the internetClientServer capability to your manifest file.
Windows Phone or Store Manifest
-
If you are on a Windows Phone project, open the visual editor of the Application Manifest, and check Internet (Client & Server) under Capabilities.
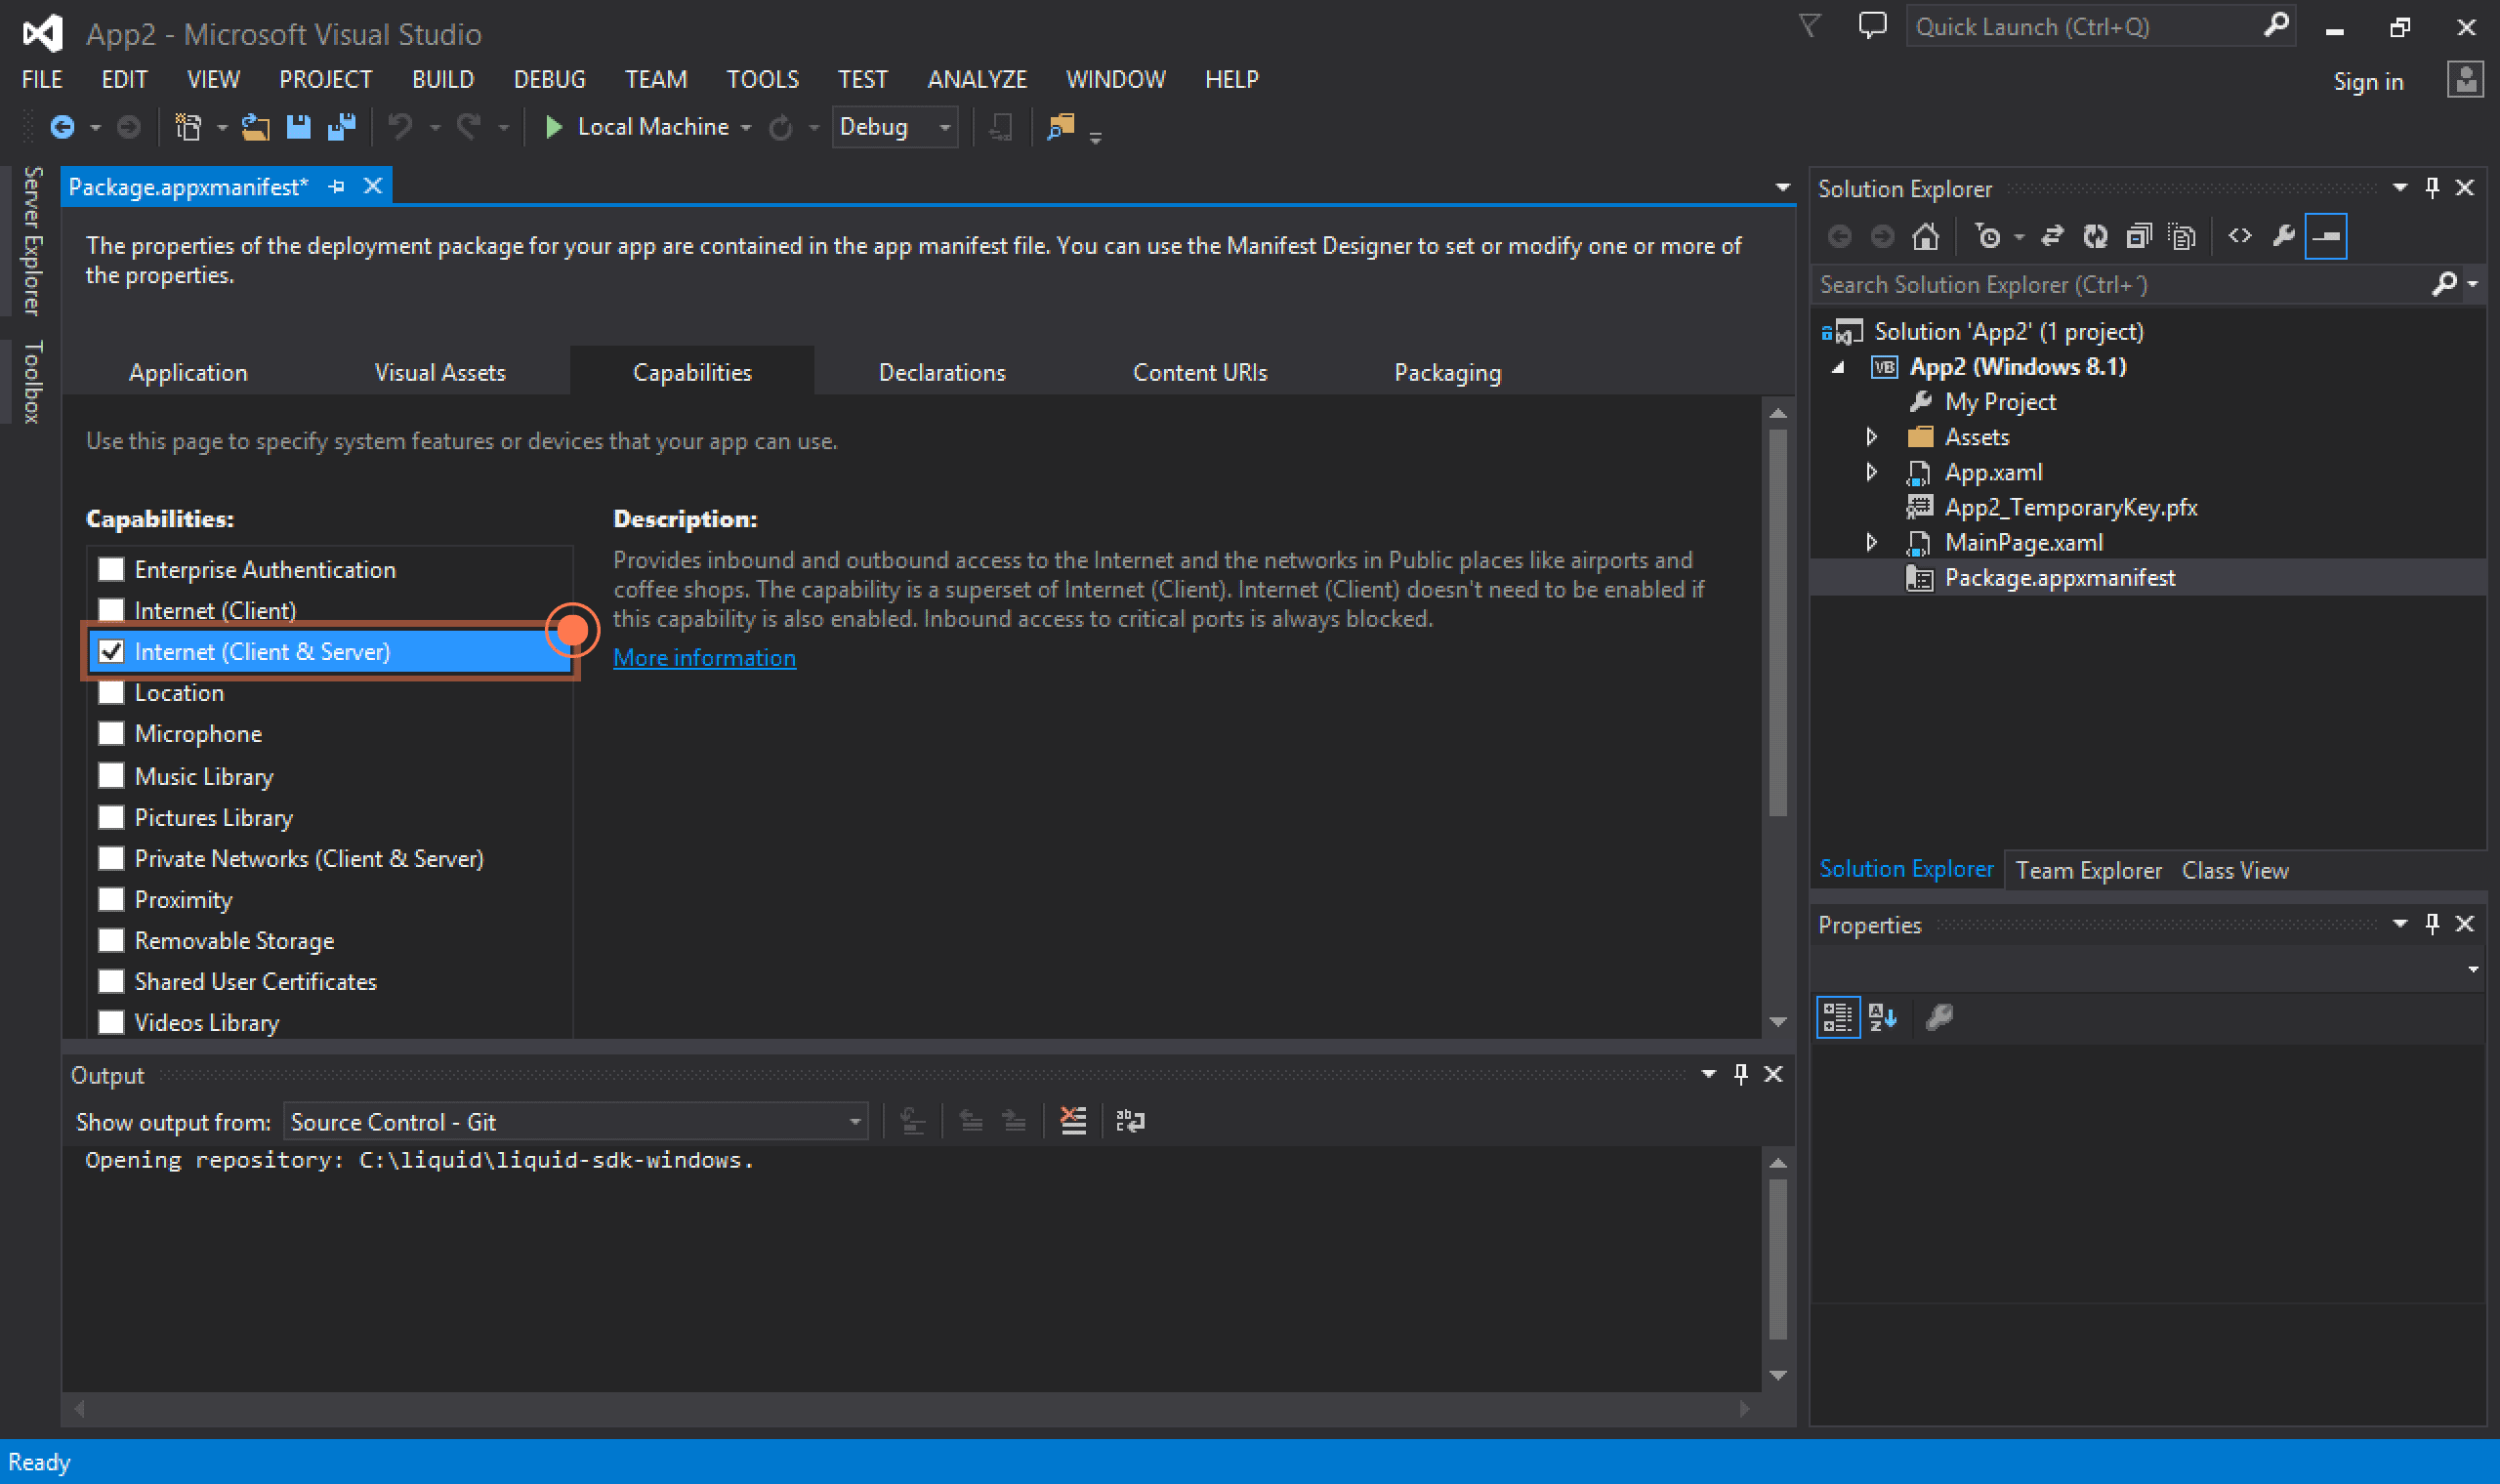
-
If you are on a Windows Store project, open the visual editor of the Application Manifest, and check Internet (Client) under Capabilities.

-
Or in the Code Editor, just before the end of the
Package.appxmanifestfile, add the highlighted line:
<Package>
  <!-- ... -->


  <Capabilities>

    <Capability Name="internetClientServer" />

  </Capabilities>
</Package>
Initialize Liquid Edit
Important note
For every app you add on Liquid, two versions of the app are created: a production and a development version. These versions have completely distinct environments (i.e., different users, devices, sessions, events, targets and dynamic variables) and each app version has its own API key.
You can initialize Liquid singleton (once per app launch) with your app API key. Typically, the best place to do this is on protected async override void OnLaunched(LaunchActivatedEventArgs e) method at your App.xaml.cs file.
Note
Note that you’ll need to prepend async to the method signature, if you don’t have it already.
You can find your App API key on the App Settings of Liquid’s dashboard.
// App.xaml.cs

protected async override void OnLaunched(LaunchActivatedEventArgs e)
 {

  // assuming that you're using a DEBUG flag
  #if DEBUG
    await Liquid.Initialize("YOUR-DEVELOPMENT-APP-TOKEN", this, e, true);
  #else
    await Liquid.Initialize("YOUR-PRODUCTION-APP-TOKEN", this, e);
  #endif

  /* The rest of your code goes here... */

}
From this moment on, each time you want to call a Liquid method you can do:
Liquid.Instance;Note
All interactions using Liquid SDK should be done using this shared instance of Liquid object (and not using LQ* models).
Identify your users Edit
In order to keep track of a specific user between different sessions and devices (or different app installations) you must identify it with a unique identifier. This will allow you to use analytics based on their information.
This identifier is usually a strong UUID, e.g: "02318f2cdd156d78fd4431". We recommend using your back-end database ID to identify a user. Alternatively, you can use an email or username, provided they cannot be changed.
Tipically, you know more about your user than only his identifier. Liquid allows you to create analytics based on this information through Key-Value user attributes (on a HashMap<String,Object>).
For each of the above situations, you should identify your user with one of the following two methods, respectively:
// Only use this method on anonymous users.

await Liquid.Instance.IdentifyUser("USER_ID");
await Liquid.Instance.IdentifyUser("USER_ID", attributes);
It is not mandatory to the user attributes at the moment of user identification. You can set their attributes later using setter methods.
Note
Liquid SDK keeps a cache of your previously identified user. This means that you don’t need to identify your user each time your app is open.
Anonymous users Edit
If you never identify your user, all activity will be tracked anonymously. As soon as a user is identified, all that anonymous activity will be automatically aliased to the identified user. This means that you’ll no longer see the anonymous user, but the identified one.
This process of user aliasing is automatic, is the default behavior and is higly recommended that you alias your users. However, if you don’t want this behavior, you may use the attribute false like shown in the following example:
await Liquid.Instance.IdentifyUser(identifier, attributes, false);Note
Our recommendation is to keep your users identified as much as you can, even after they logout. This will ease the analysis of their behaviour.
Track User attributes Edit
User attributes are Key-Value objects stored in the form of a Dictionary<String,Object>.
Data types of these attributes can be: int, string, float, bool, DateTime and null.
An example that includes all this attributes could be:
var attrs = new Dictionary<String,Object>

attrs.put("age", 30);
attrs.put("name", "Bob");
attrs.put("frequence", 1.3);
attrs.put("facebook_account", true);
attrs.put("last_activity", new Date());
attrs.put("social_profile", null);
Note
You should not store nothing more than user information on this collection, i.e. do not store information related with the device (like model or carrier). This information is stored on the device entity, as explained below.
Automatic Device tracking Edit
Information about the user device is automatically saved by Liquid SDK.
You don’t need to worry about tracking information of the device. The following device attributes are always included on analytics (example):
{
  "App Name": "Wonderful App",
  "App Version": 1.4,
  "Vendor": "NOKIA",
  "Model": "825_eu_euro1_375",
  "Device name": "John Doe",
  "System version": 8.0,
  "System language": "en",
  "Locale": "en-US",
  "Screen size": "640x960",
  "Carrier": "Vodafone",
  "Internet Connectivity": "WiFi"
}
Track device location Edit
If you have information about user geolocation (a Location) you can use Liquid to track device location. All you need to do is to inform Liquid SDK about current device location using the following method:
await Liquid.Instance.SetCurrentLocation(Geocoordinate gc);Liquid doesn’t automatically track location changes. This means you’re responsible to inform Liquid SDK each time device location changes.
From this moment on, all data points sent to Liquid will include latitude and longitude attributes associated to Device entity.
Automatic Session tracking Edit
Once again, like device information, you don’t need to worry about session tracking. Liquid does it for you, using the following logic:
- A session starts when the user is identified (using one of the user identification methods).
- A session ends when the user closes the application for more than a predefined time (default is
30seconds). This means that if the user closes the app for 15 seconds, and reopens it, session is considered the same.
We recommend you to keep the default value on this, but you can change the timeout value (in seconds) of a session by calling SessionTimeout:
Liquid.Instance.SessionTimeout = value;3. Dynamic Variables (Liquid Variables)
A Liquid Variable is a variable that holds a dynamic value which can change depending on rules that you define remotely on Liquid dashboard. You can transform any old-fashioned static variable into a Liquid Dynamic Variable just by replacing them with a Liquid method.
As an example, assume that you want to turn a static background color that was used like:
ResourceLoader resourceLoader = new ResourceLoader();


resourceLoader.GetString("welcomeString");
into a dynamic background color. You just need to replace it with something like:
await Liquid.Instance.GetStringVariable("welcomeString", fallbackColor);As soon as you compile your code and use this variable in your app, it will appear on your Liquid dashboard.
Getting values for variables Edit
Based on variable names, Liquid returns values on five different data types: DateTime, string, int, float and bool. These methods return the fallbackValue if the value is not present or valid.
await Liquid.Instance.GetColorVariable(variableKey, fallbackValue);
await Liquid.Instance.GetDateVariable(variableKey, fallbackValue);
await Liquid.Instance.GetStringVariable(variableKey, fallbackValue);
await Liquid.Instance.GetIntVariable(variableKey, fallbackValue);
await Liquid.Instance.GetFloatVariable(variableKey, fallbackValue);
await Liquid.Instance.GetBooleanVariable(variableKey, fallbackValue);
Fallback values Edit
You should always define fallback values for your dynamic variables. This will avoid strange behaviors in cases where your app is first launched without an Internet connection, but also if you accidentally delete a variable in Liquid dashboard, or define a different data type between your code and Liquid dashboard.
await Liquid.Instance.GetColorVariable(loginBgColor, Colors.Green);
await Liquid.Instance.GetDateVariable(promoDay, date);
await Liquid.Instance.GetStringVariable(title, "Hello");
await Liquid.Instance.GetIntVariable(abTestingLoginVersion, 3);
await Liquid.Instance.GetFloatVariable(discount, 0.25);
await Liquid.Instance.GetBooleanVariable(showAds, true);
To ease the development process, each time you use a dynamic variable, its fallback value will be sent to Liquid dashboard and stored as default value (only when your app is compiled with Liquid in development mode).
Fallback values vs. Targets Edit
If you use more than a variable for a Target (defined on Liquid dashboard), all variables affected by that target become dependant on each others.
This means that, if a variable value is fallen back, all the other variables on the same Target will be also fallen back.
Situations like these will only occur if you do something really wrong in your variable settings (e.g. data type mismatch between code and Liquid dashboard), but this mechanism will ensure consistency in your app.
Loading values Edit
Each time your app is open or closed/paused, new values are requested to Liquid. However, they are not immediately loaded by the SDK as it could cause strange behaviors in front of user eyes. By default, when new values are available, they will only be loaded the next time your app is open.
You can change this behavior just by setting AutoLoadVariables variable to true after initializing Liquid singleton:
Liquid.Instance.AutoLoadValues = true;Asynchronous events and delegates Edit
Optionally you can be notified of Liquid internal internal events by implementing ValuesReceived and ValuesLoaded to take action when:
- When values are received from Liquid dashboard (not necessarily loaded)
- When values are loaded
If you want to be notified of those events, you just need to implement LiquidOnEventListener interface on your code.
As an example, assuming that you want to take action on your activity, you should implement the LiquidOnEventListener interface like this:
// For example where you initialize Liquid
Liquid.ValuesReceived += LiquidValuesReceived;
Liquid.ValuesLoaded += LiquidValuesLoaded;
and your implementation file should be like this:
private void LiquidValuesReceived(object sender, EventArgs e)
 {
  // Do something with new values, e.g: await Liquid.Instance.LoadValues();

}

private async void LiquidValuesLoaded(object sender, EventArgs e) {
  Background = new SolidColorBrush(await Liquid.Instance.GetColorVariable("bgcolor", Colors.Gray));
  // Define your code here...


}
4. Recommendations and Best Practices
Fallback variables organization Edit
Most of the times, it is useful to have all dynamic variables and their fallback values in the same place.
This kind of practice not only improves code organization and readability, but also reutilization of static values in your code.
This way, we recommend you to create FallbackVariables.{h,m} files, like shown on the example below:
public class DefaultValues {
  public static final String welcome_message = "Welcome!";
  public static final int bg_color = Color.BLUE;
  public static final float discount = 0.25f;
  public static final bool show_ads = true;
}
By doing that you easily change the default variables without changing all activities, like:
Background = new SolidColorBrush(await Liquid.Instance.GetColorVariable("bgcolor", DefaultValues.bgColor));Important note
Most of the times, you’ll want to make sure that your default values (in Liquid dashboard) are the same as the fallback values (in your code).
Setup Push Notifications Edit
If you want to take advantage of the powerful Liquid segmentation feature to send Push Notifications to your users devices, you’ll need to inform Liquid about their WNS Application SID (Windows Notification Application ID) and its Secret.
This is done by calling setupPushNotifications method at the moment you have access to the Registration ID. If you already have your own push notification mechanism, please skip to this section.
- To enable Toast Notifications you should go to your Application Manifest and choose
Yesin the Toast Capable option as the image suggests: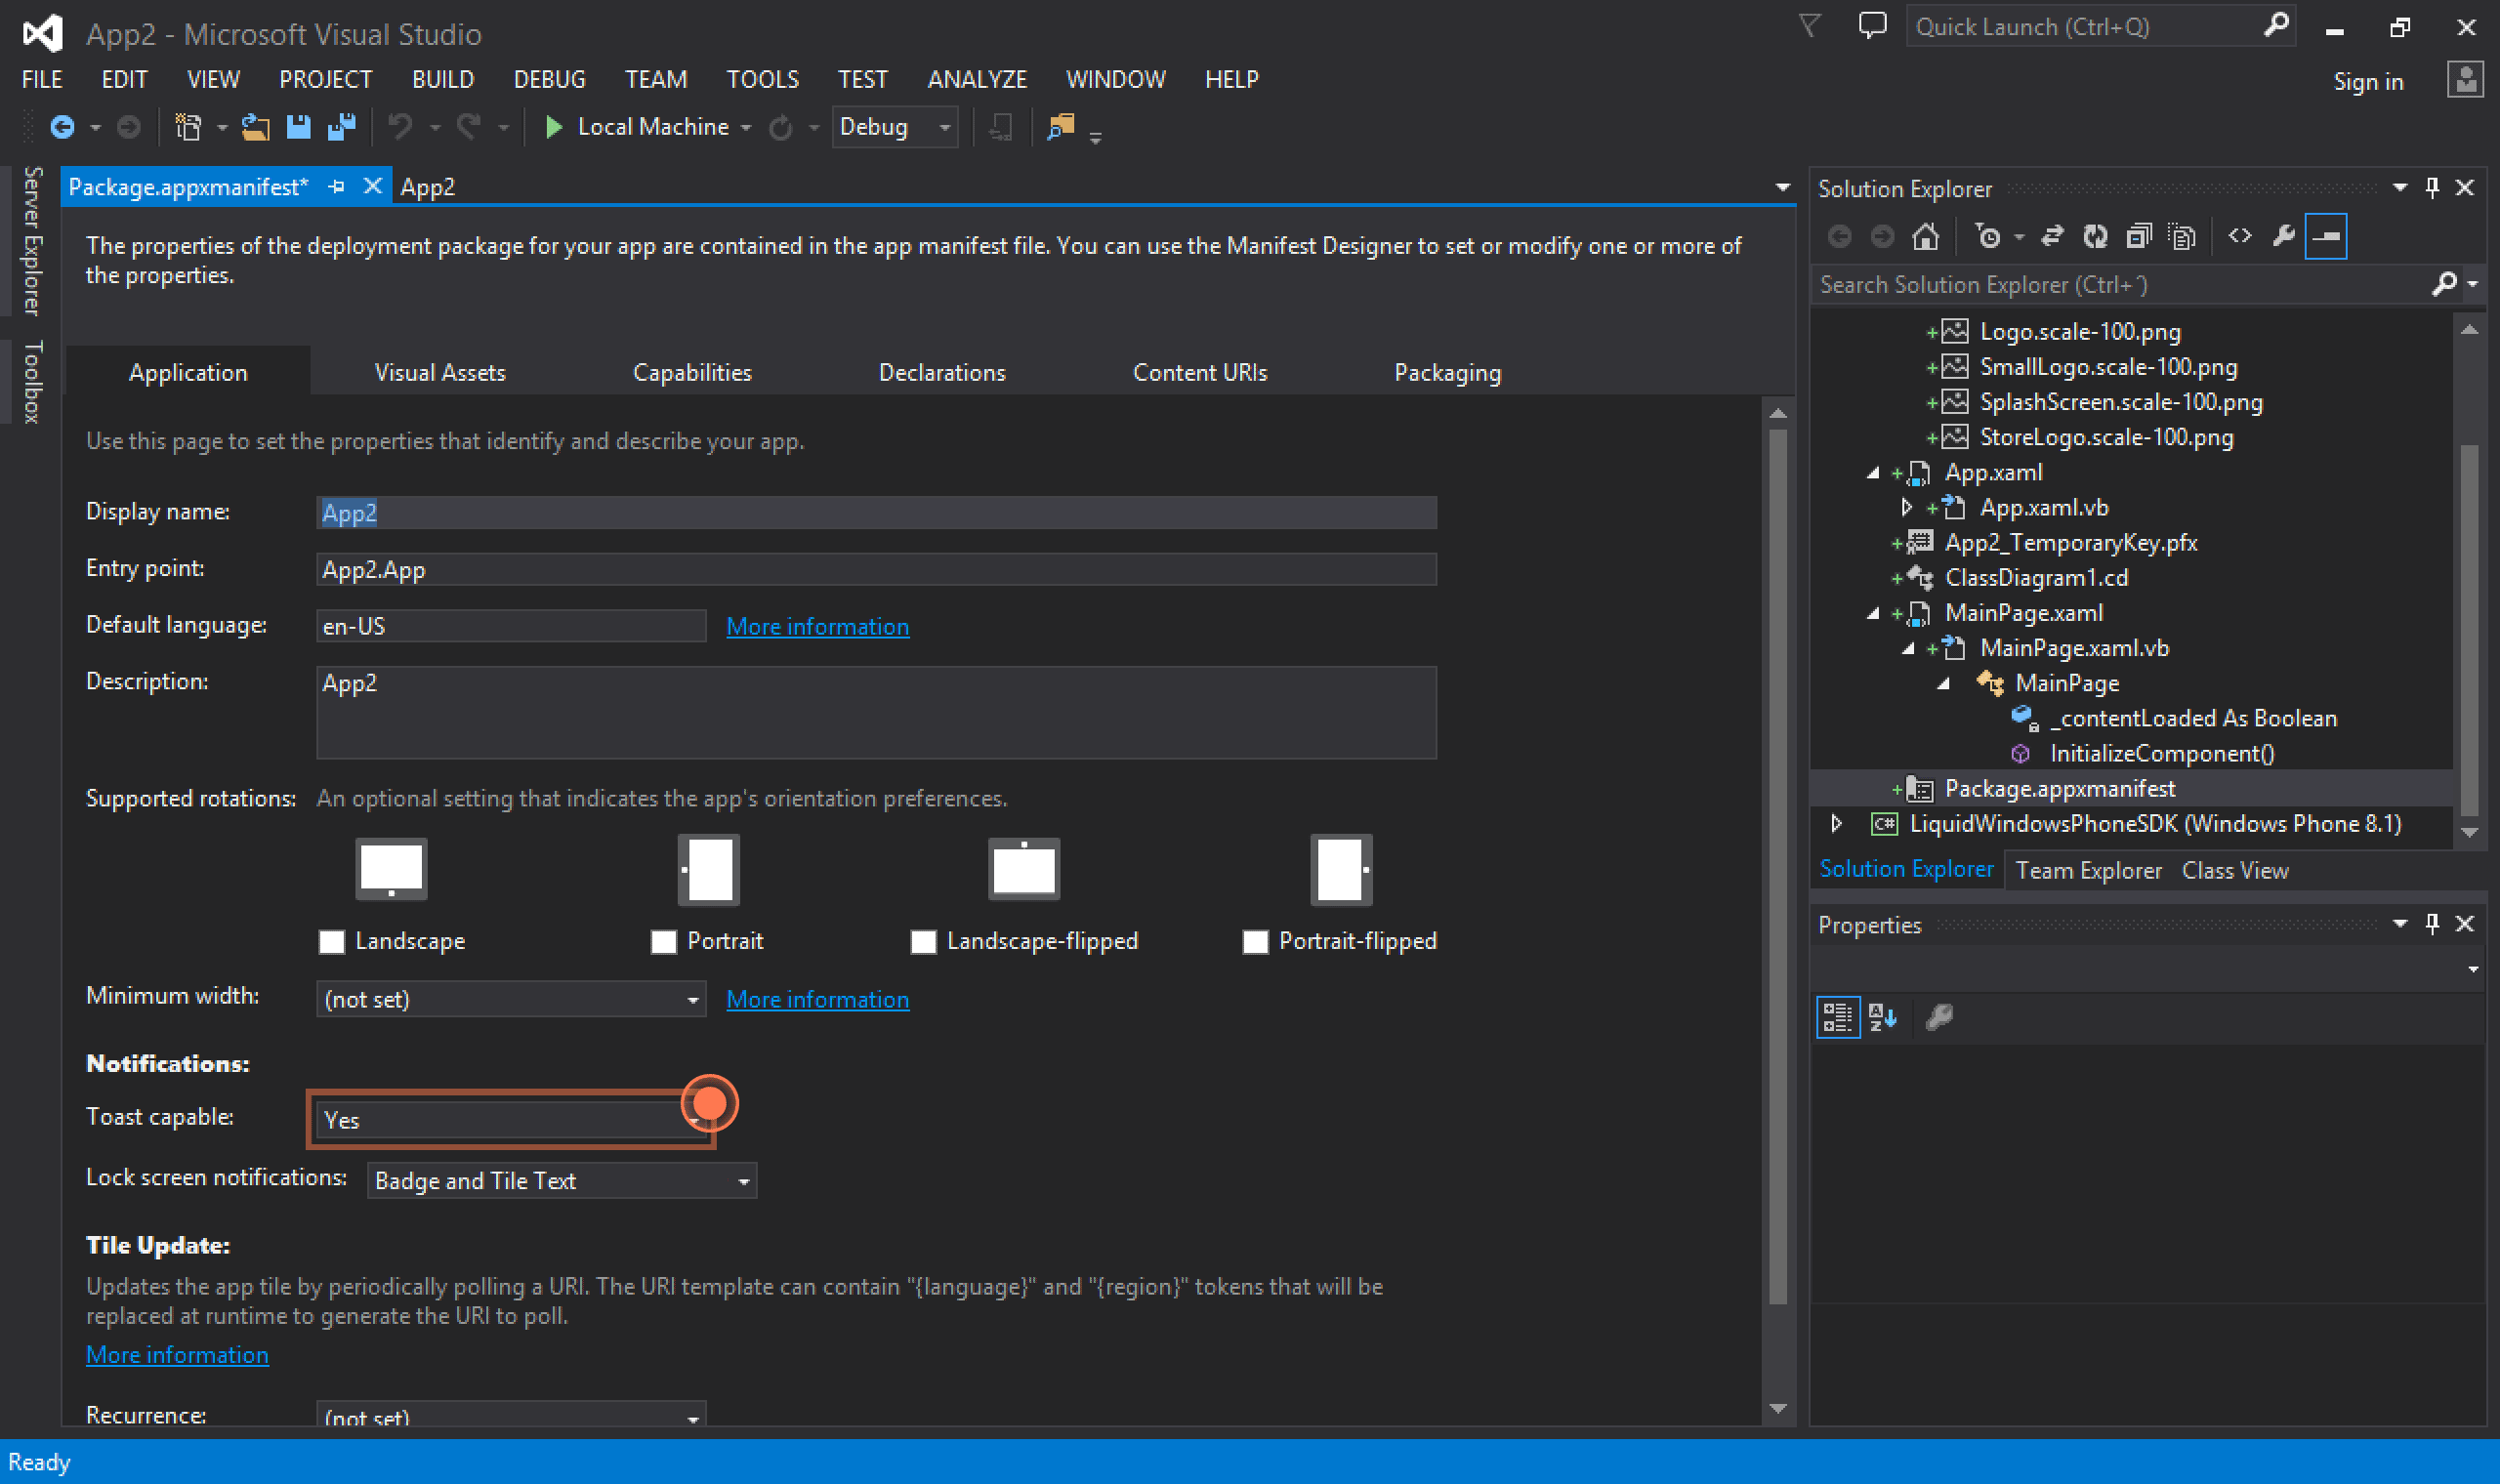
Register user to receive Push-Notifications
In order to configure your application to receive push notifications through Liquid you should call the SetupPushNotifications method as follows:
// App.xaml.cs
protected async override void OnLaunched(LaunchActivatedEventArgs e)
 {

  await Liquid.Initialize("YOUR-APP-TOKEN", this, e);
  await Liquid.Instance.SetupPushNotifications();
  /* (...) */

}
Advanced settings
If you already have your own mechanism to send push notifications, you just need to inform Liquid of your user WNS Uri, like this:
// App.xaml.cs
protected async override void OnLaunched(LaunchActivatedEventArgs e)
 {
  await Liquid.Initialize("YOUR-APP-TOKEN", this, e);
  Liquid.Instance.SetWNSDeviceUri(wnsRegistrationUri);
  /* (...) */

}
The push notifications from Liquid will contain the key lqd_message, associated with the text of the message that you created from Liquid Dashboard.
Configure WNS Application SID and Secret
To send Push Notifications as your App, Liquid must authenticate with Microsoft’s WNS, using your Application SID and the Application Secret.
Check this section to know how to import it to Liquid dashboard.